Google Apps Script and Phidgets

Introduction
Phidgets provides a JavaScript library for browser and Node.js applications. In this project, we'll create a browser application using Google Apps Script and log data from a Light Phidget to a Google Sheets spreadsheet.
References
Demonstration
Connect Phidget Devices
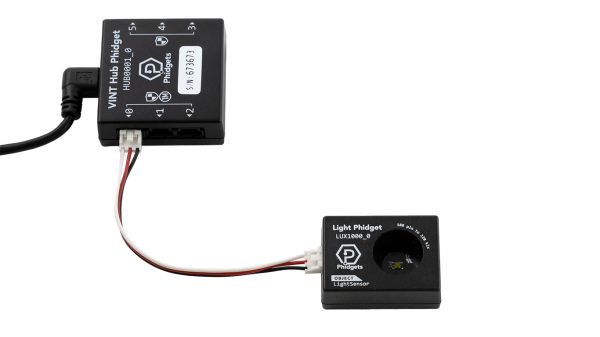
In this project, we will be using the Light Phidget (LUX1000_0) connected to a VINT Hub Phidget (HUB0002_0).
Prepare Apps Script Environment
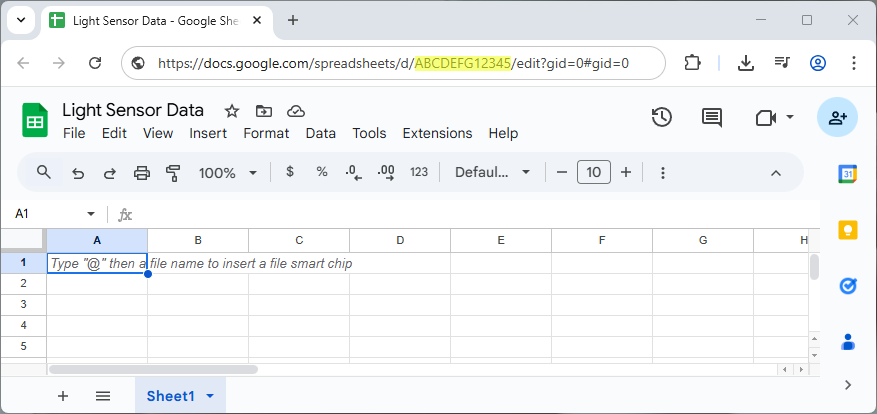
Start A New Spreadsheet
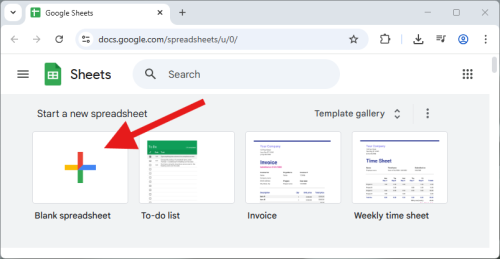
Start by creating a new spreadsheet. This spreadsheet will be used to store sensor data.
Create Apps Script
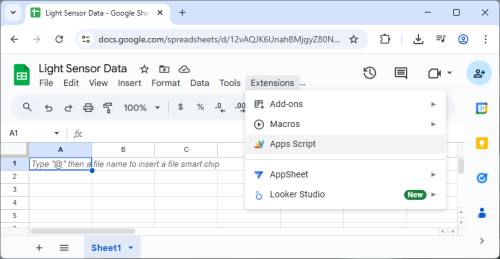
Name your spreadsheet and then navigate to Extensions > Apps Script
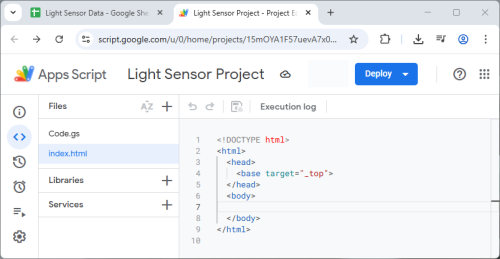
Add HTML File
Name your Apps Script project and click on the + symbol to add an HTML file.
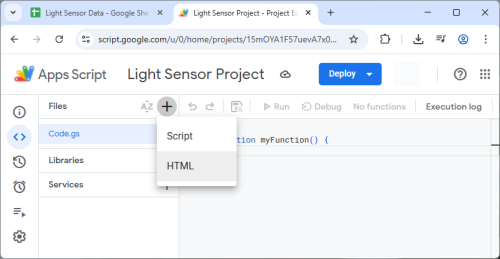
Name the file index.html.
Modify Code
Code.gs
Navigate to Code.gs and replace the contents with the following:
function doGet(e) {
  var htmlOutput = HtmlService.createHtmlOutputFromFile('index');
  return htmlOutput;
}

function writeData(data, location) {
    var spreadsheetId = 'spreadsheetID'; // Replace with your spreadsheet ID
    var sheetName = 'Sheet1'; // Replace with your sheet name

    var spreadsheet = SpreadsheetApp.openById(spreadsheetId);
    var sheet = spreadsheet.getSheetByName(sheetName);
    sheet.getRange(location).setValue(data)
}
Spreadsheet ID
You can find the spreadsheet ID by navigating to your spreadsheet and copying the string of letters and numbers between /d/ and /edit in the URL.
index.html
Navigate to index.html and replace the contents with the following.
<!DOCTYPE html>
<html lang="en">
   <head>
      <meta charset="UTF-8">
      <title>Light Sensor Example</title>
   </head>
   <body>
      <button id="grant-usb-access">Connect USB Device</button><br><br>
      <button onclick="runExample()">Run Example</button><br><br>
      <label>Sensor Data: </label><label id="sensorLabel"></label><br><br>
      <input type="checkbox" id="logCheckbox">
      <label>Log to File</label><br><br>
      <script src="https://unpkg.com/phidget22@3.x/browser/phidget22.min.js"></script>
      <script>
         (async function () {
         const illuminanceChangeDataEl = document.getElementById("sensorLabel");
           const checkbox = document.getElementById("logCheckbox");
           var index = 0;

         function onLightSensor0_IlluminanceChange(illuminance) {
         illuminanceChangeDataEl.textContent = illuminance.toString() + 'lx';
             if (checkbox.checked) {
               google.script.run.writeData(illuminance.toString(), "A" + index++)
             }
         }

         try {
         const conn = new phidget22.USBConnection();
         await conn.connect();

         const grantAccessBtn = document.getElementById('grant-usb-access');
         grantAccessBtn.addEventListener('click', () => conn.requestWebUSBDeviceAccess());

         const lightSensor0 = new phidget22.LightSensor();

         lightSensor0.onIlluminanceChange = onLightSensor0_IlluminanceChange;

         await lightSensor0.open(30000);
             lightSensor0.setDataInterval(1000);
         } catch(err) {
         console.error('Phidget error:', err);
         }

         })();
      </script>
   </body>
</html>
USB vs Network Server Connection
When using the Phidgets with JavaScript, you can connect to devices directly via USB or remotely through the Phidget Network Server. Depending on what you choose, this line of code will change:
const conn = new phidget22.USBConnection(); //Use when connecting directly via USB
const conn = new phidget22.NetworkConnection(5661, 'localhost'); //Use when connecting through the Phidget Network Server
In this example, we are connecting directly via USB, so we use the first option. For more information, visit our JavaScript page.
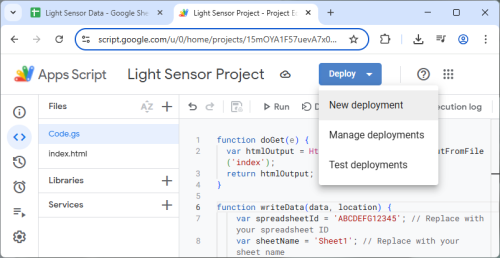
Deploy Web App
To deploy the app, find the Deploy button and select New Deployment:
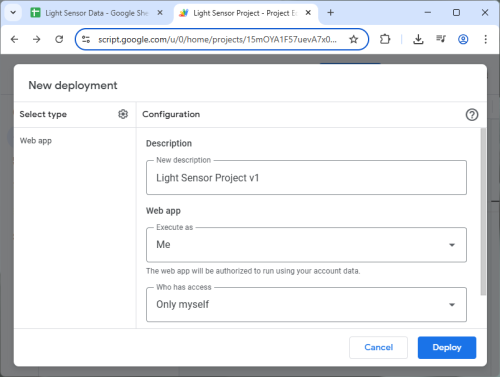
Select Web App as the type, provide a description, and press Deploy:
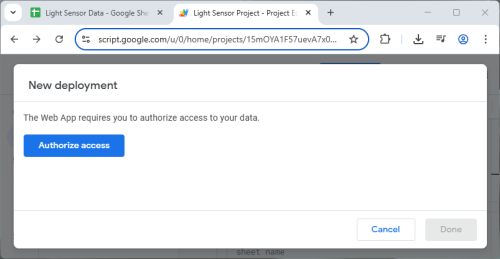
Authorization is required as the web app will access a Google Sheet:
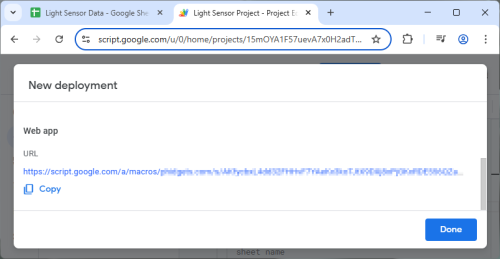
After authorizing, a URL for your web app will be generated:
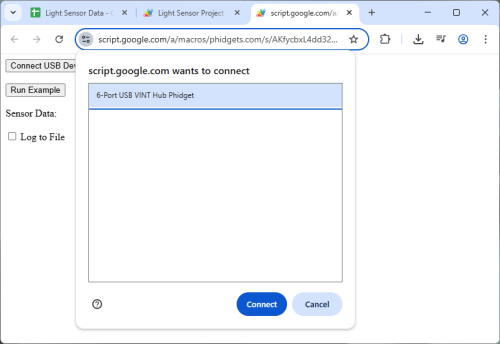
Request USB Device Access
The web app provides a Connect USB Device button:
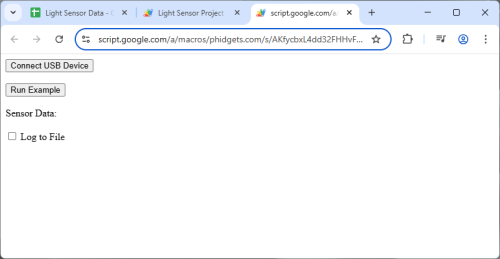
In order to access Phidget devices over a USB Connection, websites must gain permission from the user through an interactive element, like a button.
Run Example
After granting access, the Run Example button can be pressed, and data will stream from the Phidget device to your browser application:
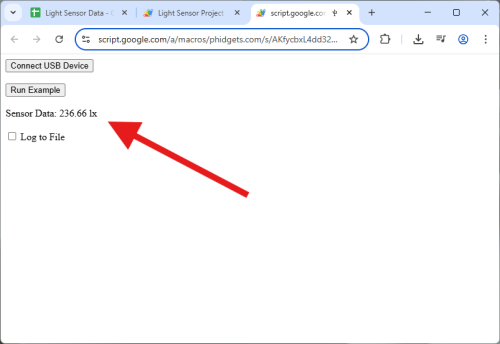
Check the Log to File box and data will be streamed to your spreadsheet.