T-Slot Guide
Introduction
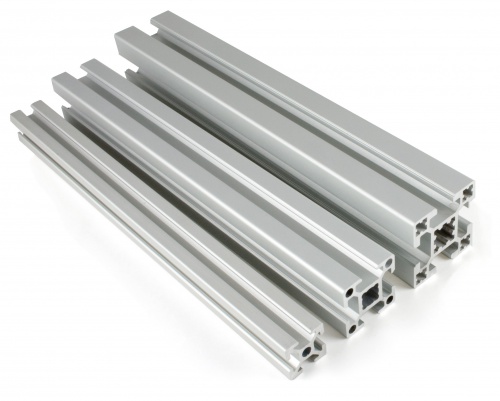
T-Slot is a framing system composed of extruded aluminum profiles which use the namesake slot as a mounting point for various hardware components. Phidgets carries three different series of T-Slot extrusions. A 20mm, 30mm, and 40mm standard. For each series we carry a single (20x20mm, 30x30mm, 40x40mm) and double (20x40mm, 30x60mm, 40x80mm) wide extrusion. The series you end up using depends where on the weight vs. strength scale your project ends up falling. Obviously the smaller extrusions will not be as strong and rigid as the larger extrusions. The manufacturer provides equations for calculating how strong the extrusions are on pages 11 and 12 of the Manufacturer's Catalogue. The modulus of elasticity is listed as approximately 70,000N/mm². The moment of inertia is listed under the specifications for the specific extrusion profile you are using. With those two parameters you should be able to calculate with reasonable accuracy the relationship between force applied and resultant beam deflection.
For each profile size, we carry a kit that contains many of the connectors and parts described in this guide, in addition to bolts, washers, and bits for drilling and tapping the profiles.
The first thing you will need to do is cut the extrusions to length. There are 2 ways to do with. Either with a band saw or a chop saw with an appropriate blade (there are carbide blades designed for cutting aluminum). Once your extrusions are cut down to size you will want to connect them together:
Connecting Extrusions Together
In order for this whole system to be useful you need a way to combine individual extrusions into a more complicated structure. There are a number of options available for this, each better suited for different situations.
Screw Connectors
These are the most basic form of connection. A simple bolt that goes from one extrusion to the next. In order to use a screw connector there are 2 prerequisite steps you must do before installing. You need to tap the first extrusion with an appropriate tap for the series you are using (check the product page for the screw connector for which tap is required), and you need to drill a hole in the second extrusion big enough to allow Allen key access to the head of the screw connector. For example, here is a piece of 30x60mm extrusion prepped for connecting:
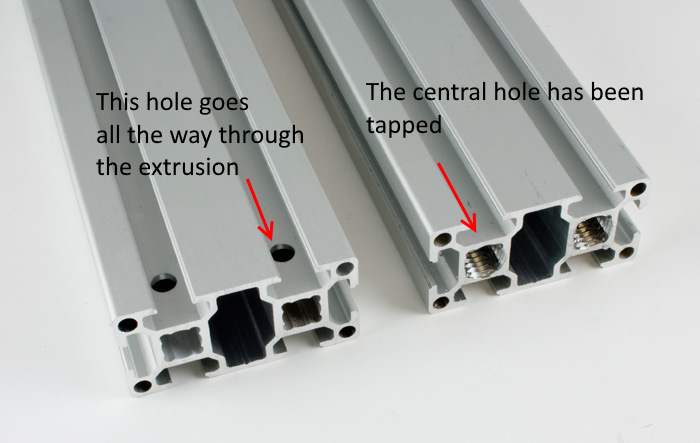
Once this is done you can screw the connector into the newly tapped extrusion. When you get close to the end, slide the head of the connector into the slot on the other extrusion and tighten the rest of the way through the hole you drilled.

Brackets
The diecast aluminum as well as the T and L plate steel brackets allow you to strengthen joints that will experience particularly heavy loads. You should always use them to reinforce joints which already use another type of connector rather than connecting the extrusions purely via the brackets. For all three styles of bracket you will need a few nuts. We recommend preset or square, the T nuts won't work well for this application. Installation is fairly simple, you don't have to drill and preliminary holes or anything. Just insert the nuts and bolt the brackets on. For example:

Inner Brackets
The inner brackets are a special variant of bracket that are different enough from the other brackets that they deserve their own section. These brackets do not need to be used with other connection methods. They are suitable by themselves (though you could use a reinforcement as well if you wanted to). The one important distinction to make with these brackets is that there are two models of bracket, A and B. The difference is that the set screw hole is slightly canted so that the set screw pushes the bracketed extrusion into the other extrusion to tighten the hold. For example:
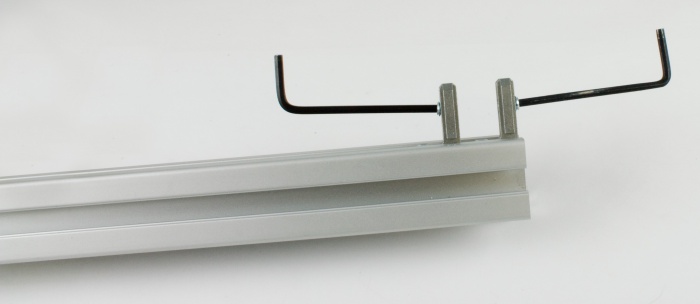
Notice how both brackets have the set screws canted towards the extrusion. This way the extrusion you are connecting to this one will be pulled in towards it when the set screws are tightened. The effect is small but important. The left-hand bracket in this case is the A series while the right-hand one is the B series. Here is a diagram showing which series is appropriate for which connection a bit more clearly:
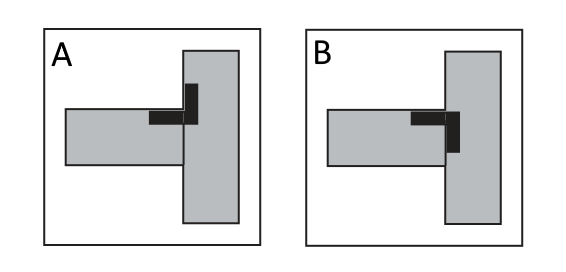
You should always use 2 inner brackets to connect 2 extrusions together.
Butt Connectors
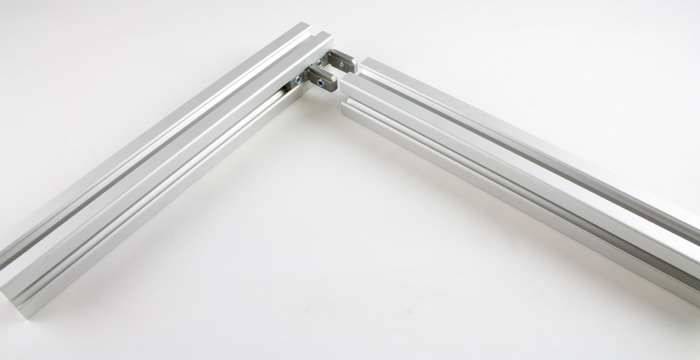
These connectors are ideally suited to connecting an extrusion to the middle of another extrusion in a T junction. They have a similar effect to the screw connectors but don't require access to the other side of the perpendicular extrusion (for example if you had another extrusion there already for a + configuration). They can also be used with the plate brackets if you want an even stronger connection (but not the diecast brackets). They do require that you drill a hole into the extrusion to use however. Specifically 13mm hole, 11mm deep and 16mm in from the end of the extrusion for the PG30 variant and a 17mm hole, 14mm deep and 22mm in from the end of the extrusion for the PG40 variant. These connectors should always be used in pairs (on opposite sides of an extrusion) so you will need to drill 2 such holes. Once done, you can insert the connectors and bolt the extrusions together using preset nuts or square nuts.

Notice that because of the way these connectors line up with the nuts they won't make a clean 90° corner. This is why they are better suited for use in the middle of an extrusion somewhere to make a T junction. For cleaner corners, we recommend you use the screw connectors instead.
Cubic Connectors
In addition to making 2D right angle corners, you may want to connect 3 extrusions together like in the corner of a cube. For this, you will want to use the cubic connectors. These connectors behave very much like screw connectors in that you must tap out the central hole on the end of the extrusion. You will then also need to insert a bore reducing sleeve (included with the connector) into the hole which will allow you to bolt the connector on. The PG30 variant requires an M12 tap while the PG40 variant requires an M14 tap.

Linear Bar Connectors
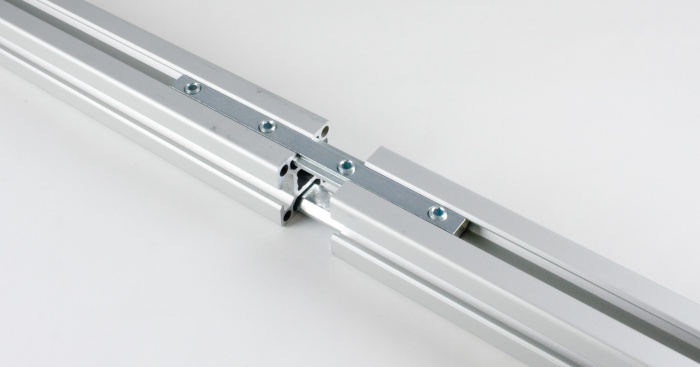
To join two extrusions together to make a longer extrusion you can use linear bar connectors. They come in packages of 4 so that you can connect all 4 slots for strength but you could get away with just using 2 and it will be plenty strong. We do not recommend using only one connector on a single joint. Nothing special needs to be done to prep the extrusions, you can simply slot the bar into the extrusions and tighten the set screws.
Anchor Connectors
Anchor connectors are the only real option available for connecting extrusions at non-right angles. While they can also connect extrusions at right angles, there are other connection methods that are better suited for this case. To use an anchor connector you will need to drill a hole in the extrusion being butted up against the other. For the PG30 variant it will need to be a 12mm hole, 21mm deep and 30mm from the end of the extrusions (measure from the center of the extrusion if you have cut it at an angle) and for the PG40 variant it will need to be a 15mm hole, 27mm deep and 32mm from the end of the extrusion. Then, back out the hex head on the anchor so that it comes apart into two pieces:
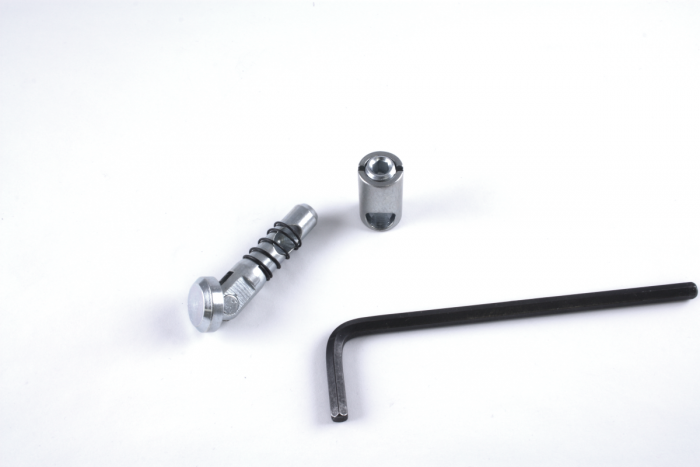
The half with the hex head will insert into the hole you have drilled while the half with the actual anchor slides into the central hole in the profile of the extrusion. Slide the pieces back together and tighten the hex head just enough that it bites and holds the halves together again. You can now slide the pivoting head into the slot on your other extrusion and tighten the hex head to clamp the extrusions together.

Connecting Things to Extrusions
T-Slot offers a convenient way to build frames for all manner of different applications. None of that is useful of course if you can't easily mount things to that frame. There are two main methods for attaching things to a frame. You can either bolt it directly to the frame with a small bracket or plate that is bolted on with some form of nut, or alternatively use the slot profile reducers to insert a panel into the frame which you can then mount to.
Preset/Square/T Nuts
Bolting something directly to the frame is the easiest method for attaching things to T-Slot structures. There are 3 options for nuts that work with each series (PG20, 30, 40).
Preset nuts
The preset nut is shaped to fit loosely into the slot so it can slide back and forth into position but not turn. This allows you to tighten the bolts to it with no fuss. These are the fastest possible option, with a good combination of strength and ease of use. Here is an example of an acrylic plate mounted to an extrusion with some preset nuts.
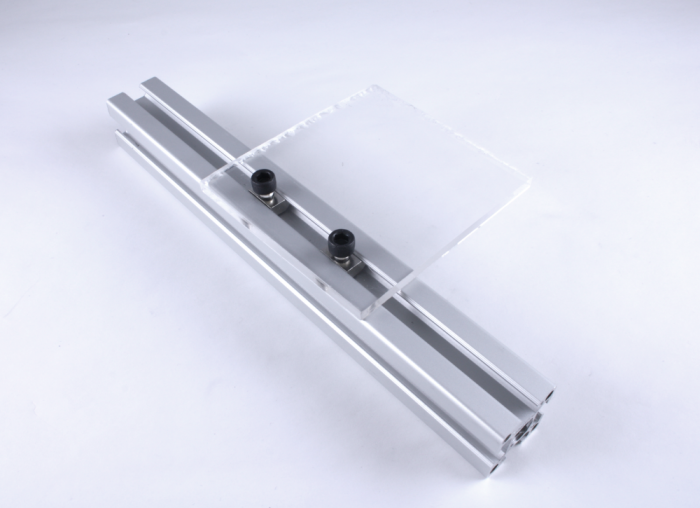
One note on the bolts: The size of bolt required is dictated by the size of hole in the nut being used obviously. We have several bore sizes for each series of nut (20,30,40). The length of the bolt though is the tricky part. The bolt should not touch the extrusion at all, you want to make sure that the bolt is long enough to go through the object you are mounting on and sink into the nut far enough to get a strong connection but not so long that it sticks out the far side of the nut and digs into the aluminum as this will cause some wiggle in the mounting point. For example, for the 5mm thick acrylic plate above M6x10mm bolts were used. Since the nuts are about 6mm thick in the case of PG30 (which is what was used for this example) that lets the bolt go deep enough into the nut to be secure while still leaving about 1mm of clearance plus the distance between the nut and the extrusion.
Square nuts
Square nuts behave in almost exactly the same way as preset nuts except that they require you to put the tension spring on them and slid into the profile a bit more carefully. Technically the tensioner isn't totally necessary but it helps keep the nut in place while you are bolting to it. It also allows you to bolt things to a vertical surface more easily. See the preset nut section about the size and length of bolts you should use.

T nuts
T nuts are the trickiest to use as well as the least secure of the 3 nut variants but in return they are the only one that can be used after the fact or on extrusions where the ends are not accessible for one reason or another. The ability to install T nuts directly on the side of an extrusion is very useful. They also allow you to disconnect a component quickly. To use a T nut you should start by screwing it on to the object loosely. Then orient the nuts so they are aligned and slot them into the extrusion. Finally, carefully turn the bolt heads until the nut is turned 90 degrees and is seated in the extrusion. Then tighten the bolts the rest of the way and you are done. See the preset nut section about the size and length of bolts you should use.

Profile Reducers and Panel Mounts
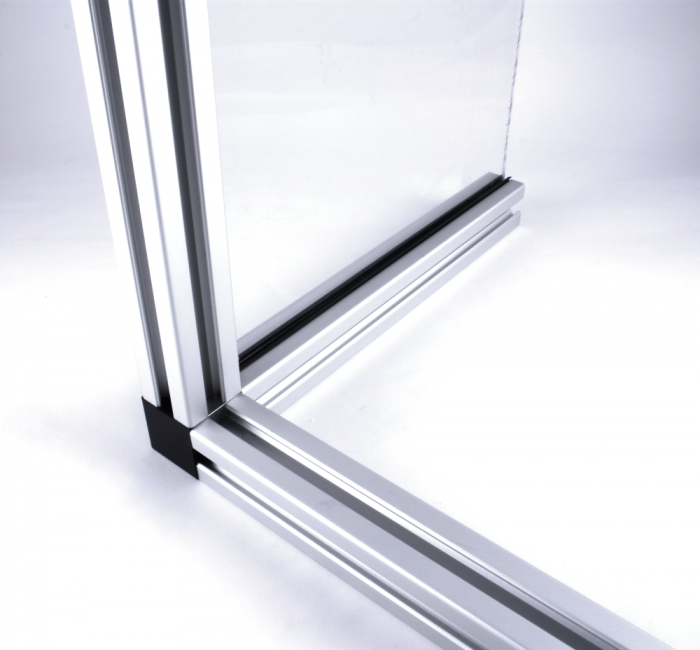
The profile reducers are plastic inserts for the T-slot slots which allow you to put panels in your structure. While the profile reducers grip surprisingly strong we still recommend you border the panel on at least 2 sides to ensure a secure hold though you could border the panel on all 4 sides if you wanted to be extra secure. The profile reducers are simple to cut to length with side cutters or even a sharp utility knife and they slot into the extrusions with minimal effort. They accept panels anywhere from 3-5mm in width. Here is an example of an acrylic panel being used but you could use anything you'd like (steel or aluminum plate, other types of plastic, even cardboard if you do desired).
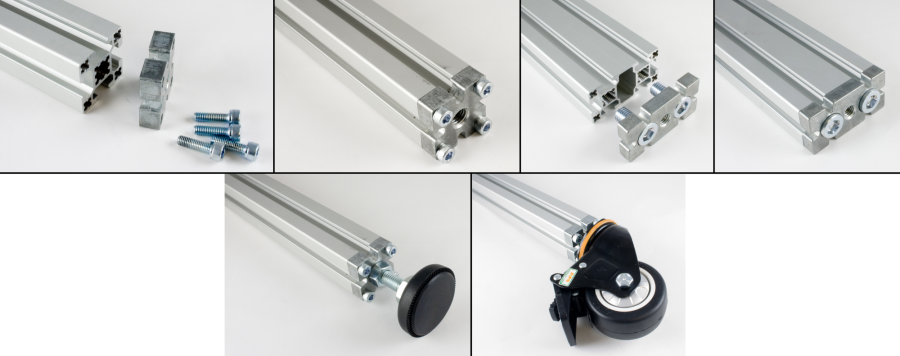
Feet and Castors
In order to connect feet or castor wheels to your structure you will first have to install an adapter end plate. This requires tapping the face of the extrusion with an M6 tap or M14 tap for the 40x40mm and 40x80mm profiles respectively. These plates are only available for the PG40 series extrusions. Once the plate it installed, the foot or castor will screw into the central hole.
